1) download dah
rootkitkatzen5v3 dan pastikan download SKU (cth : ww / tw) yang betul
*link download
rootkitkatzen5v3 :
DiSini atau
DiSini
2) Extract dan copy folder
RootZenFone5KitKatv3-ww tersebut ke dalam laptop/PC
3) Setelah selesai downlod
intelandroid atau
PC-link kemudian install ke dalam laptop/PC..
*Link download IntelAndroidDrvSetup1.5.0.exe :
DiSini
*Link download PC-link :
DiSini
4) Anda perlu terlebih dahulu mengaktive "USB debugging" click
DiSini dan "Media device (MTP) click
DiSini .
5) Seeloknya reboot/restart dahulu sebelum teruskan ke langkah seterusnya.
6) Sambungkan phone dengan laptop/pc via cable dan open PClink.
7) pergi ke file \RootZenFone5KitKatv3-ww yang telah di copy/paste ke laptop/pc.
8) Untuk check connection antara phone dengan computer baik anda perlu menggunakan "CheckBeforeAction".
###############################################################################
###Command Prompt#############################################################
###############################################################################
'
' Connect your device and turn on USB degbugging in Development menu
' or install PCLink (http://pclink.asus.com)
'
' Make sure 'ASUS Android Composite ADB Interface' installed on your computer
' successfully.
'
'
Press any key to continue . . .
* daemon not running. starting it now on port 5037 *
* daemon started successfully *
###############################################################################
###Close Command Prompt########################################################
###############################################################################
9) Click Root-ZenFone kemudian satu windows command prompt akan muncul seperti di bawah.
###############################################################################
###Command Prompt#############################################################
###############################################################################
'
'
' Connect your ZenFone 5 with your computer and prepare to ROOT
'
' !!! DO NOT DISCONNECT USB CABLE WHILE ROOTING !!!
'
'
Press any key to continue . . . <<<Press Enter>>>
* daemon not running. starting it now on port 5037 *
* daemon started successfully *
'
'
' Unlocking bootloader ..
'
'
target reported max download size of 1319067648 bytes
sending 'dnx' (96 KB)...
OKAY [ 0.499s]
writing 'dnx'...
OKAY [ 0.655s]
finished. total time: 1.154s
target reported max download size of 1319067648 bytes
sending 'ifwi' (1983 KB)...
OKAY [ 0.702s]
writing 'ifwi'...
OKAY [ 0.874s]
finished. total time: 1.576s
rebooting into bootloader...
OKAY [ 0.343s]
finished. total time: 0.343s
'
'
' Flash recovery with ROOT process and do the dirty job
' The phone will be rebooted twice, please be patient ..
'
'
target reported max download size of 1320708778 bytes
sending 'recovery' (12807 KB)...
OKAY [ 1.964s]
writing 'recovery'...
OKAY [ 1.092s]
finished. total time: 3.056s
target reported max download size of 1320708778 bytes
sending 'update' (883 KB)...
OKAY [ 0.581s]
writing 'update'...
OKAY [ 0.874s]
finished. total time: 1.455s
###############################################################################
###Close Command Prompt########################################################
###############################################################################
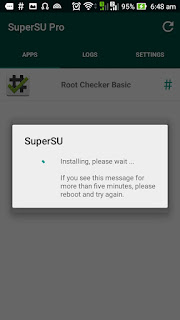
10) kemudian tekan 'enter' phone akan automatik reboot/restart and tunggu sehingga siap jangan sesekali menganggu sistem tersebut.
13) Setelah proses selesai dan phone telah pun di hidupkan semula ikuti langkah di bawah.
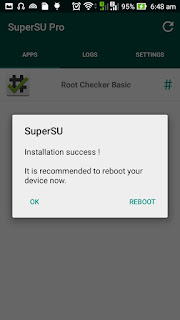
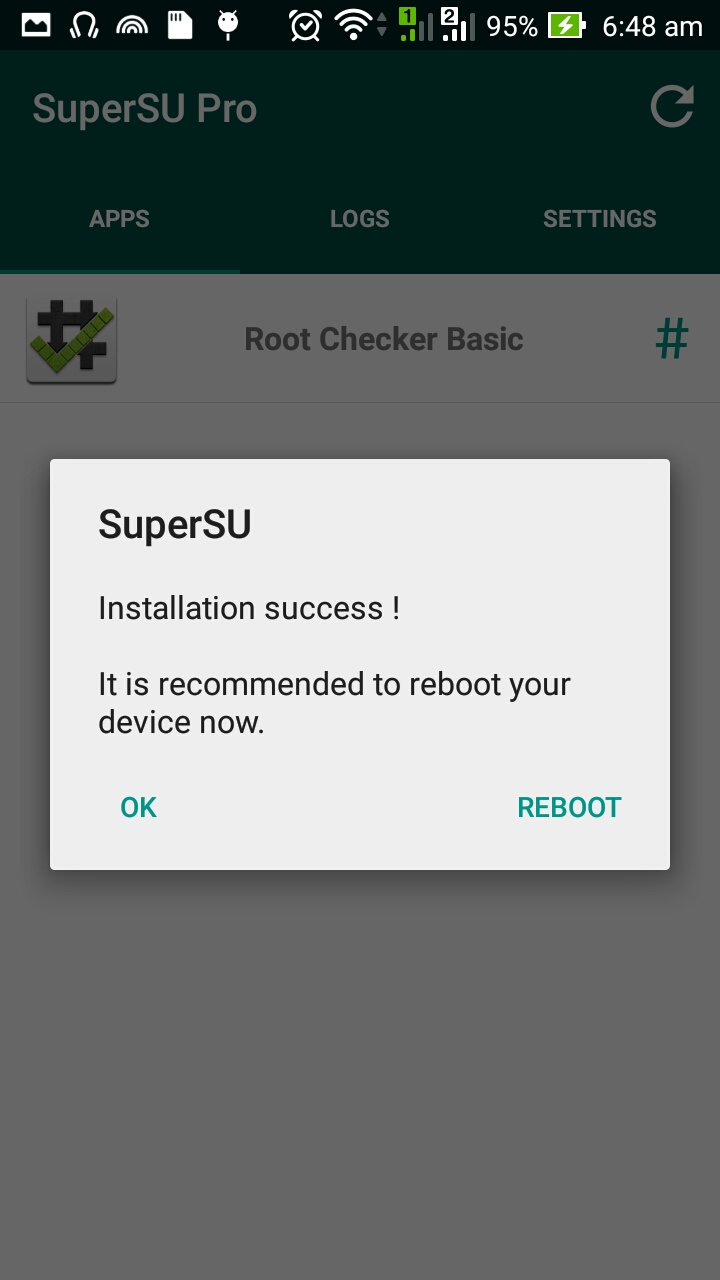
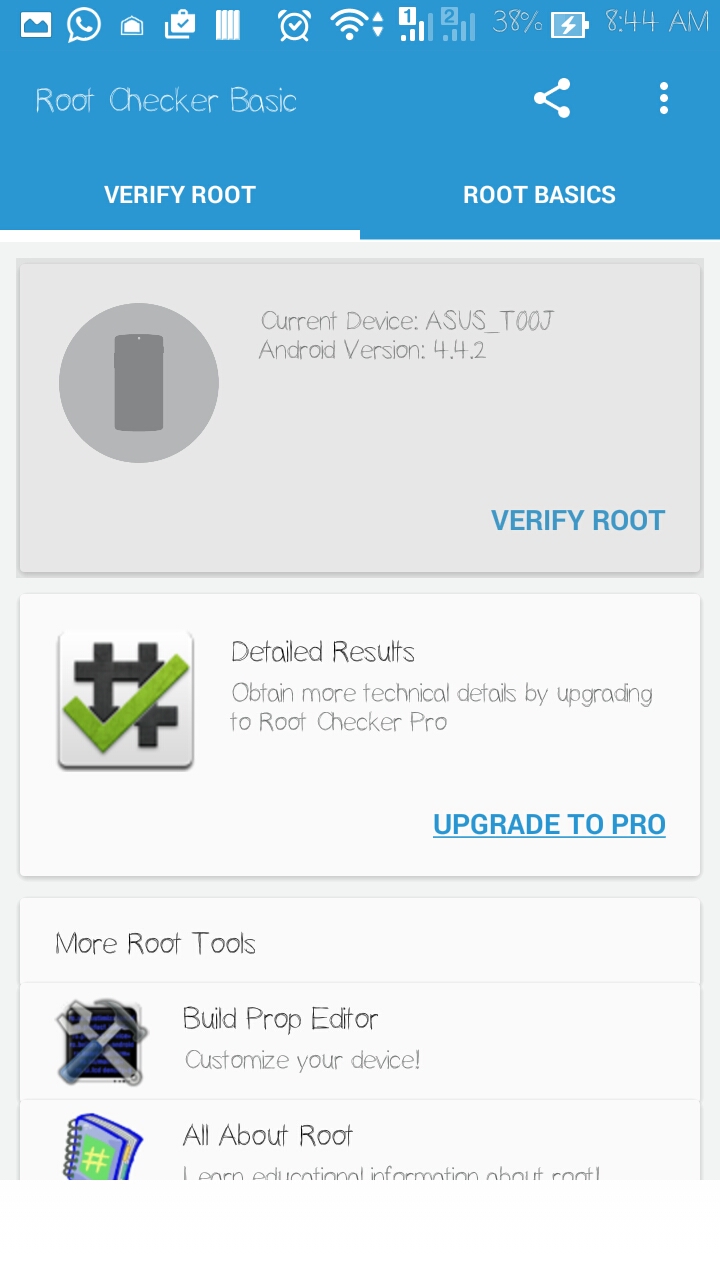
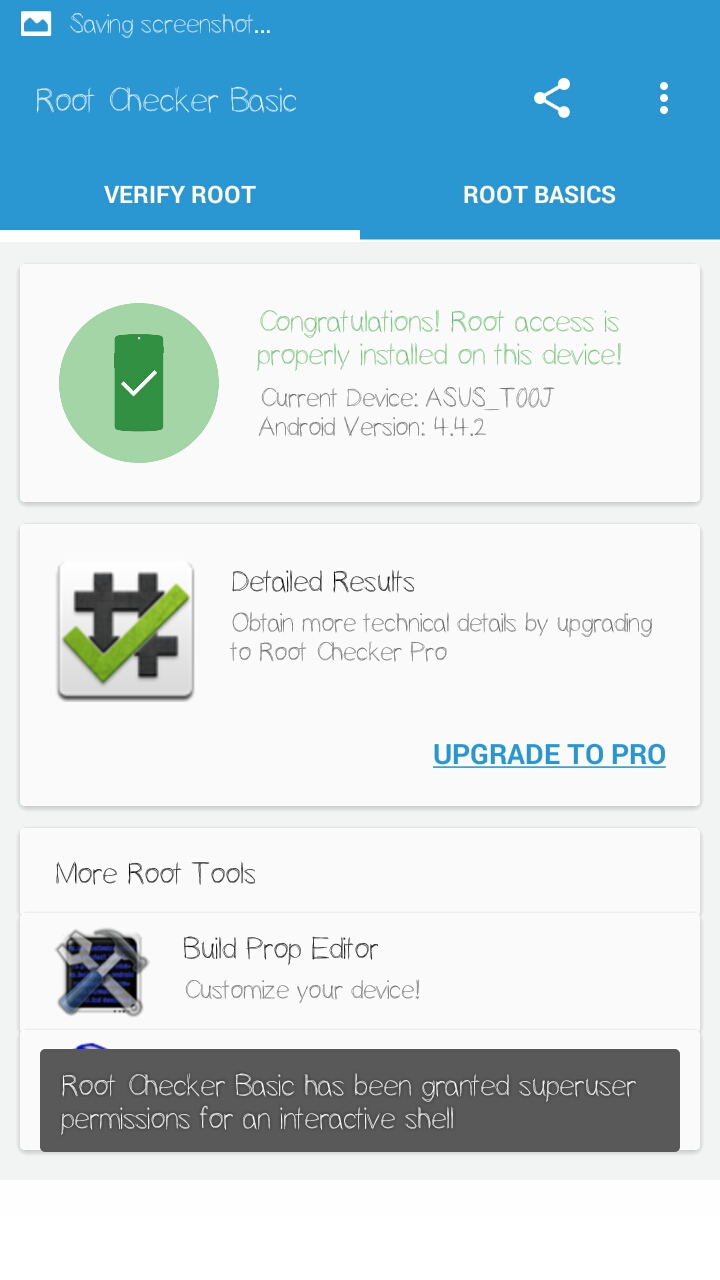
11) download app 'root checker' untuk menyemak phone anda berjaya atau tidak.
open root tool tu..plih chek before act. Click
DiSini untuk video.

12) Jika ingin un-root smartphone lakukan langkah yang sama seperti langkah(5).
###############################################################################
###Command Prompt#############################################################
###############################################################################
'
'
' Connect your ZenFone 5 with your computer and prepare to UN-ROOT
'
' !!! DO NOT DISCONNECT USB CABLE WHILE UN-ROOTING !!!
'
'
Press any key to continue . . . <<<Press Enter>>>
* daemon not running. starting it now on port 5037 *
* daemon started successfully *
'
'
' Unlocking bootloader ..
'
'
target reported max download size of 1319067648 bytes
sending 'dnx' (96 KB)...
OKAY [ 0.499s]
writing 'dnx'...
OKAY [ 0.655s]
finished. total time: 1.154s
target reported max download size of 1319067648 bytes
sending 'ifwi' (1983 KB)...
OKAY [ 0.702s]
writing 'ifwi'...
OKAY [ 0.874s]
finished. total time: 1.576s
rebooting into bootloader...
OKAY [ 0.343s]
finished. total time: 0.343s
'
'
' Flash recovery with UN-ROOT process and do the dirty job
' The phone will be rebooted twice, please be patient ..
'
'
target reported max download size of 1320708778 bytes
sending 'recovery' (12807 KB)...
OKAY [ 1.964s]
writing 'recovery'...
OKAY [ 1.092s]
finished. total time: 3.056s
target reported max download size of 1320708778 bytes
sending 'update' (883 KB)...
OKAY [ 0.581s]
writing 'update'...
OKAY [ 0.874s]
finished. total time: 1.455s
##############################################################################
13) kemudian tekan 'enter' phone akan automatik reboot/restart and tunggu sehingga siap jangan sesekali meganggu sistem tersebut.
14) Setelah proses selesai dan phone telah pun di hidupkan semula ikuti langkah di bawah.
~GoodLuck~